

 welcome news gate-level rtlib cosimulation browser waveforms
 scripting documentation download webstart gallery links about
Applets
contents visual index usage FAQ feedback license
Hades scripting
While the interactive simulation mode is great for prototypes and for playing with circuits, selecting the same functions over and over again via the GUI again can be cumbersome. Therefore, most simulation frameworks provide means to script actions, and Hades is no exception. While any scripting language with a Java interface can be used to control the Hades editor and simulator, the Jython language has evolved into our favorite scripting solution for Hades. The next sections describe the Jython console provided as part of the Hades framework, while the last section sketches how to integrate Hades into Matlab.
The Jython console
To open the Jython scripting shell, select the options menu and then the open Jython console command:
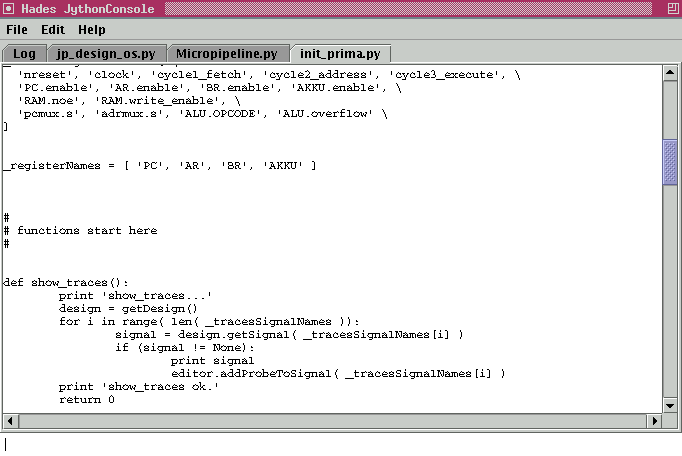
The user-interface of the Jython console consists of the following parts:
- the standard drop-down menus (file, edit, help).
- the log-panel that shows the Jython interpreter output.
- three editor panels to edit your scripts.
- the interpreter input textfield at the bottom.
Simply type your Jython commands into the command textfield and press the Enter (return) key to execute the command. The command text is shown in green color while the interpreter is idle (ready to accept a new command), but shown in red while the interpreter is still busy with a previous command. The output of the Jython interpreter is appended to the log-panel.
You can also select the execute selection or execute buffer commands to execute the selected parts or the whole contents of the active editor buffer.
You can use all three scratchpad buffers as normal text editors, including the standard cut/copy/paste operations. Advanced functions like search or syntax-highlighting are not provided (yet). The console will reject attempts to load files into the log-buffer, to avoid overwriting the interpreter log (but you can save it).
Note that the initialization of the Jython console will fail when the editor cannot create the Jython interpreter thread - usually, because Jython is not installed on your system. Please see the next section for details.
Jython installation and setup
To use the Jython scripting console, you will first need to download and install Jython. Visit the Jython homepage and follow the links to download the latest (or latest stable) version. After downloading, run the installer to get a fully working Jython installation. Hades only requires the basic Jython classes, all of which are in the central jython.jar class archive file.To run the Hades editor as an application with Jython scripting enabled, put both the hades.jar and jython.jar class archives into your CLASSPATH, and then run the editor. For example, type the following into a WindowsXP command shell:
  set CLASSPATH=c:\temp\hades.jar;c:\temp\jython.jar
  java -Xmx512m hades.gui.Editor
To reduce download times, neither the Hades applet nor the Hades webstart version include the Jython classes and scripts. This implies that you will not be able to use the Jython scripting functions from the Hades applet or webstart version, unless you add the jython.jar archive file to your Java virtual machine extension directory. On the standard JDK, simply copy the jython.jar archive file into the JDKROOT/lib/ext directory, where JDKROOT points to the installation directory of your JDK or JRE (e.g. C:\j2sdk_1_5_0). Hades will now autodetect the Jython classes and enable scripting.
Other scripting languages
Jython arguably offers the best integration between Java and any scripting language. However, you should be able to use your favorite scripting language to control the Hades editor and simulator. Just try it!
Matlab and Hades
For example, we have successfully used Hades from the Matlab workspace, which offers a luxurious environment to control the simulator and editor. Just add the hades.jar archive file to the Matlab classpath settings via the Workspace, restart Matlab, and access Hades. For example:adapter = hades.utils.MatlabAdapter; adapter.setMatlabPath( path ); adapter.loadProperties( 'hades.ini' ); adapter.setProperty( 'Hades.Editor.ViewMode', 'false' ); editor = hades.gui.Editor; editor.setExitOnLastWindowClose( 0 ); frame = editor.getFrame; frame.setSize( 800, 600 ); editor.doOpenDesign( 'hamming.hds', 0 ); editor.getSimulator.runForever; % start the simulationThe following script shows one way to drive a simulation with predefined input stimuli:
editor.getSimulator.stopSimulation; % stop previous simulation
design = editor.getDesign;
I0     = design.getComponent( 'I0' );
I1     = design.getComponent( 'I1' );
I2     = design.getComponent( 'I2' );
I3     = design.getComponent( 'I3' );

s0     = 'U01010101010101010U'
s1     = 'U00110011001100110U'
s2     = 'U00001111000011110U'
s3     = 'U00000000111111110U'

editor.getSimulator.runForever; % start the simulation
for k=1:length(s0)
  time = k*2.0    % 2 seconds intervals
  s0(k)
  I0.assign( s0(k), time )
  I1.assign( s1(k), time )
  I2.assign( s2(k), time )
  I3.assign( s3(k), time )
end